OpenIndiana Installation walkthrough - Part 2
This is Part 2 of a series of posts explaining how to configure OpenIndiana as NAS storage device. The series is made up of the following parts:
- Background information about OpenIndiana and OS installation
- Network configuration and Setting up storage
- Presenting storage to your Hosts with iSCSI and/or NFS
- Performance testing
We ended Part 1 with a newly installed OS and a login screen. Now it is time to configure and start to use the OS.
I found the configuration a good learning process. I do not call myself a Linux Expert, but I do know my way around most Linux Distributions, but OpenSolaris – is not one that I have ever played with – so there was a steep learning curve involved until I found the information I needed, and collected here in this post.
So.. What are we going to do in this part?
- Install VMware Tools (so we that the VMXNET3 adapter will be recognized)
- Configure networking
- Allow SSH to OpenIndiana
- Add virtual storage to OpenIndiana and create a ZPool
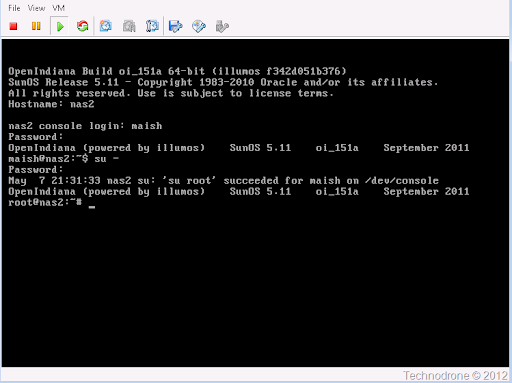
Login to the OS with the user you created in the precious part and then su – to root user.
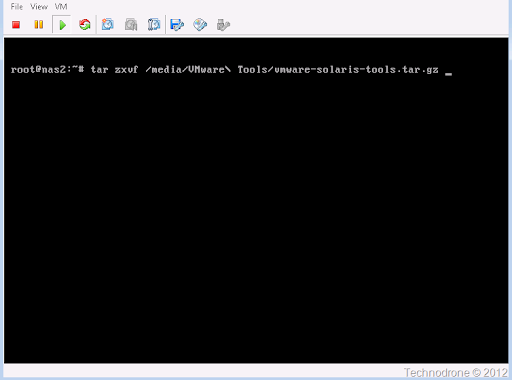
First things first – is install VMware Tools – otherwise we cannot configure the network. From the vSphere console mount the VMware Tools ISO in the guest. Extract the tarball and install Vmware Tools with
tar zxvf /media/VMware\ Tools/vmware-solaris-tools.tar.gz
and then
./vmware-tools-distrib/vmware-install.pl --default
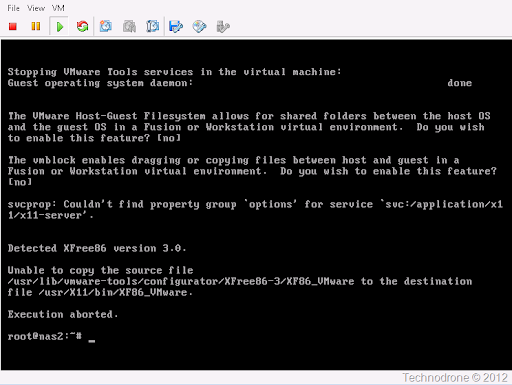
Here is where I hit my first snag. The tools would not configure properly – I was presented with a error like the one below
The solution that I found to solve this was to create the file that it was complaining about
touch /usr/lib/vmware-tools/configurator/XFree86-3/XF86_VMware
After that VMware Tools installation and configuration went smoothly.
A reboot is now needed.
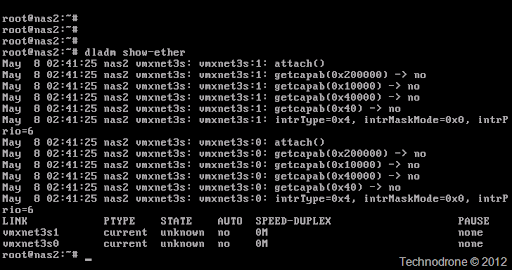
The commands in OpenIndiana are quite different from any other linux distribution. To check which network card(s) are installed in the system use the dladm command (in my VM there are two).
As you can see the NICs have strange names. I felt more comfortable using the a naming convention like all other Linux distributions and changes the name of the links – with the syntax below.
dladm rename-link vmxnet3s0 eth0
The interface by default does not receive its IP from DHCP – in fact from I saw it is not even active. In order to set the NIC to receive it’s IP from DHCP this needs to be configured with the ipadm command.
ipadm create-addr –T dhcp eth0/v4dhcp

To see what IP was assigned to the VM.
ipadm show-addr eth0/v4dhcp
If you have no DHCP on the subnet and would like to configure a static IP for the interface
ipadm create-addr -T static -a local=192.168.168.5/24 eth0/v4addr
Working in a console session is not as convenient as a remote putty session to the VM – and here I hit snag #2. I was presented with an error:
“Error connecting SSH tunnel: Incompatible ssh server (no acceptable ciphers)”.
This post led me to the solution for this problem.
Add this into the /etc/ssh/sshd_conf on the VM and restart the ssh service
(service sshd restart does not work!!)
Ciphers aes128-cbc,blowfish-cbc,aes256-cbc,3des-cbc
and then
svcadm restart ssh
Setting up DNS is also not so bad.
Create the resolv.conf file with vim /etc/resolv.conf and put in the domain suffix and your DNS server IP
Then configure the nsswitch.conf file so that the resolution will be done through DNS.
cp /etc/nsswitch.dns /etc/nsswitch.conf
You can check that you resolution is working with

Now it is time to update the OS with pkg
I thought similar to apt-get (which it is) I would run pkg update but I was returned an error.
First you will need to update the pkg package itself with
pfexec pkg install pkg:/package/pkg
Which will update the package itself and then you can run a OS update
We will install one addition package as well for iSCSI for later.
pkg install iscsi/target

Now we have an updated system, and it is time to add some storage to the VM (for the sake of this tutorial I only added a 5GB disk). Power off the OS.
poweroff
Add a new Hard disk, 5 GB Thick Lazy Zero to a new SCSI adapter and power on the machine.
First we will find the name of the disk that was added.
cfgadm -la 2> /dev/null
c3t0d0 is the first disk where the OS is installed and the new that was added is c4t0d0 – this is the one we will use.
First we need to create a zpool, but what is a zpool you may ask?
Storage pools
Unlike traditional file systems, which reside on single devices and thus require a volume manager to use more than one device, ZFS filesystems are built on top of virtual storage pools called zpools. A zpool is constructed of virtual devices (vdevs), which are themselves constructed of block devices_: files, hard drive_ partitions_, or entire drives, with the last being the recommended usage. Block devices within a vdev may be configured in different ways, depending on needs and space available: non-redundantly (similar to_ RAID 0_), as a mirror (RAID 1) of two or more devices, as a_ RAID-Z (similar to RAID-5) group of three or more devices, or as a RAID-Z2 (similar to RAID-6) group of four or more devices.
Thus, a zpool (ZFS storage pool) is vaguely similar to a computer’s RAM. The total RAM pool capacity depends on the number of RAM memory sticks and the size of each stick. Likewise, a zpool consists of one or more vdevs. Each vdev can be viewed as a group of hard disks (or partitions, or files, etc.). Each vdev should have redundancy because if a vdev is lost, then the whole zpool is lost. Thus, each vdev should be configured as RAID-Z1, RAID-Z2, mirror, etc. It is not possible to change the number of drives in an existing vdev (Block Pointer Rewrite will allow this, and also allow defragmentation), but it is always possible to increase storage capacity by adding a new vdev to a zpool. It is possible to swap a drive to a larger drive and resilver (repair) the zpool. If this procedure is repeated for every disk in a vdev, then the zpool will grow in capacity when the last drive is resilvered. A vdev will have the same capacity as the smallest drive in the group. For instance, a vdev consisting of three 500 GB and one 700 GB drive, will have a capacity of 4 x 500 GB.
In addition, pools can have hot spares to compensate for failing disks. When mirroring, block devices can be grouped according to physical chassis, so that the filesystem can continue in the case of the failure of an entire chassis.
Storage pool composition is not limited to similar devices but can consist of ad-hoc, heterogeneous collections of devices, which ZFS seamlessly pools together, subsequently doling out space to diverse filesystems as needed. Arbitrary storage device types can be added to existing pools to expand their size at any time.
The storage capacity of all vdevs is available to all of the file system instances in the zpool. A quota can be set to limit the amount of space a file system instance can occupy, and a reservation can be set to guarantee that space will be available to a file system instance.
(Source: Wikipedia)
If you would ask me to summarize this in my own words – a zpool is a group of one or more disks that can make up a disk volume. So lets create the first zpool
zpool create disk1 c4t0d0
and check that it succeeded with
zpool status disk1
That is the end of Part 2 – next up is how you can present storage to your Hosts with iSCSI and/or NFS.


