Writing
Migrating the Blog Part - 4
This is part of a series of posts about how I completed the migration of my blog from Blogger to a self-hosted solution based on AWS S3.
- Part 1 - Decide on where to host the new blog and which platform I would use
- Part 2 - Export all the content out of Blogger and new blog design
- Part 3 - Import all the content into the new blog
- Part 4 - Fix up all the content issues (This post)
- Part 5 - Redirect all old content to the new site
Welcome to the most tedious part of my migration.
I am going to use the same blog post that I showed in the example in Part 2.
Here is the the beginning of the markdown code that was generated from the conversion process
---
title: 'The case of the my SSL cert – RTFM!!!!!'
date: 2009-12-26T17:00:00.000+02:00
draft: false
tags : [Management, Administration, MJTV, VMware, Troubleshooting, vCenter]
---

It took me a while to understand why this was not working - it could be because I hate - actually loath -having to dig through logs because of Java and Tomcat issues, but I only have my self to blame for this one.

I am currently installing a new [vCenter](http://www.vmware.com/products/vcenter-server/) for my Production Environment (this is part of my [MJTV series](http://technodrone.blogspot.com/search/label/MJTV) that I currently going through the process). The last time we installed - we were just starting out with [VMware](http://www.vmware.com/) – and there have been a decent amount of problems that we have encountered because of lack of experience and knowledge. Therefore a new vCenter (not from scratch but that is another post entirely).

Fast forwarding a couple of years - the technology has evolved - and I have gained more knowledge. So one of the things that were never implemented correctly was an SSL Certificate for vCenter. I wanted to do this right so I started out on what and how this should be done.

Firstly – this is the official VMware [reference document](http://www.vmware.com/files/pdf/vsp_4_vcserver_certificates.pdf). Since we are a Microsoft shop with a established PKI Infrastructure I went to page 2 - _Replacing Default Server Certificates with Certificates Signed by a Commercial CA._

Ok so first things first. In order to create the Certificate Signing Request (CSR) you will have to download the OpenSSL binaries from [here](http://www.slproweb.com/products/Win32OpenSSL.html). Since the vCenter is a 64-bit box – I got the [64-bit version](http://www.slproweb.com/download/Win64OpenSSL-0_9_8l.exe). Before installing the software you will need to download and install I installed the [Visual C++ 2008 Redistributables (x64)](http://www.microsoft.com/downloads/details.aspx?familyid=bd2a6171-e2d6-4230-b809-9a8d7548c1b6) as well otherwise you will not be able to run the binaries.

I installed to it all to **C:\\Program Files\\OpenSSL.** In the **bin** Directory of the installation folder are the files you will work with.

First you generate an RSA key for your host.

**C:\\Program Files\\OpenSSL\\bin>openssl.exe genrsa 1024 > rui.key**
Let’s have a look at the first 5 lines.
---
title: 'The case of the my SSL cert – RTFM!!!!!'
date: 2009-12-26T17:00:00.000+02:00
draft: false
tags : [Management, Administration, MJTV, VMware, Troubleshooting, vCenter]
---title:is the title of the post.date:is the date the post was posteddraft:is a config that notes if this post should be public or nottags:this is a list of tags that was assigned to the post
Organizing posts into years
I had over 700 posts from the old blog and finding a single post in all of that was ridiculous, so I re-organized my posts by year into different folders like this:
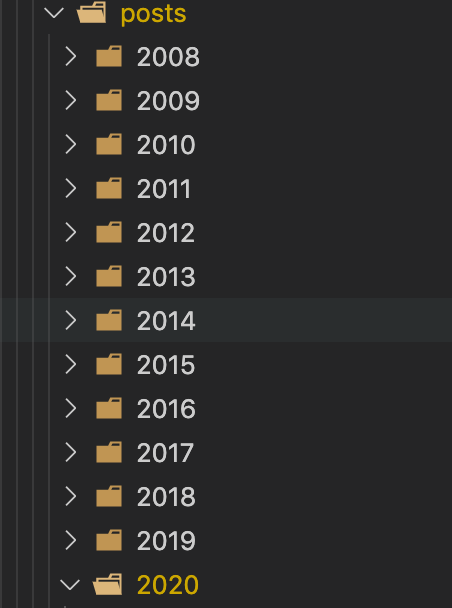
Now I had some law and order.
Fixing up dates
I did not like the long dates (my pet peeve) so I used a quick sed to shorten them all to YYYY-MM-DD
sed -i "" -E 's/T[0-9]{2}:[0-9]{2}:[0-9]{2}.[0-9]{3}\+[0-9]{2}:[0-9]{2}//' *.md
Code snippets
Man this was a mess, as I said I had code all over the posts over the years. Some of it with syntax highlighted, some of just plain text, and some of it on gists
Have a look below
```
\[req\]
req\_extensions = v3\_req
```

And in the v3\_req section:

```
\[ v3\_req \]
subjectAltName          = @alt\_names

\[alt\_names\]
DNS.1   = vcenter.maishsk.local
DNS.2   = vcenter
```
Extra backslashes - and all other sorts of messed up code all over. I scripted as much of this as I could to remove these characters, clean up the code blocks as much as possible - but it was a lot of tedious manual work.
Embeds (screencasts, asciicinema, youtube)
Again, years of technical debt, different tools I had used over the years.
All of the embedded videos from youtube - were lost during the conversion - which meant I needed to go over each and every post and add them back in. Luckily there is a simple syntax that you can use in Hugo - they are called shortcodes.
For an embedded Youtube video I could use a shortcode.
I had to go through the same thing for all the embedded tweets.
The conversion process rendered them as follows:
> This will officially be the end of docker... It has been a while in the making [https://t.co/kBTjpXAzAL](https://t.co/kBTjpXAzAL)
>
> — Maish Saidel-Keesing (☁️🚀☁️) (@maishsk) [February 20, 2019](https://twitter.com/maishsk/status/1098295411117309952?ref_src=twsrc%5Etfw)
This needed to be adjusted to use a shortcode as well, but I needed to go through all my posts and clean these up.
Image hosting
The next part in my technical debt….
Over the years I used a number of providers to host the images on the blog.
Some of them on google
https://lh3.googleusercontent.com/-RPRdcC5Me-s/TLYcIUzgVZI/AAAAAAAABS8/9UD-4Q3NBOM/s519/IMAG0020.jpg
Some were under my own domain
http://maishsk.com/blog/images/9afe098d3bf9_12A37/Screen-Shot-2015-03-12-at-18.32.08_thumb.png
Some were hosted directly in blogspot
http://lh3.ggpht.com/-Ioo8RirNJ-Y/TjlPkNslCzI/AAAAAAAAB4o/A7c3RqIJFU8/image%25255B51%25255D.png
As I said a mess - and to top it all off, the links were a mix of http:\\ and https:\\
In order to get them all under my control, I had to find all the images that were not under my direct control, download them, upload them again to my domain, and then modify all the links within the posts.
And of course modify all the links to use SSL.
I used a script or two to accomplish this - but I did have to tinker quite a bit with it - because it was not a foolproof.
Static pages
This was probably the easiest part of the process.
I had 4 static pages
Instead of battling with the conversion of the content on the page - I just re-created them using manually - it was not a lot of work.
For the Contact page - I used Getform
Last up in the series is Part #5, redirecting all the old content to the new site.