Writing
Blog Publishing Process
There are a number of ways to publish content for a blog, and many people who have moved to static HTML platforms like hugo use a similar flow.
In my Blog Migration Series, I went through how the migration process. This post will be about how I actually publish my content, and the flow that I have found that works for me.
My tools
The tools that I use are:
- vscode is my code editor of choice. I use a number of extensions (a.k.a plugins to help me during my work.)
- A private github repository to store all my content (I will explain why this github repo is private shortly)
- AWS S3 for the “webhosting” of my content
- AWS CodeBuild for the build engine to generate the content
- AWS Lambda for a scheduled task (more on this later)
- AWS SNS for notifications by email
The workflow
A picture is worth a thousand words.
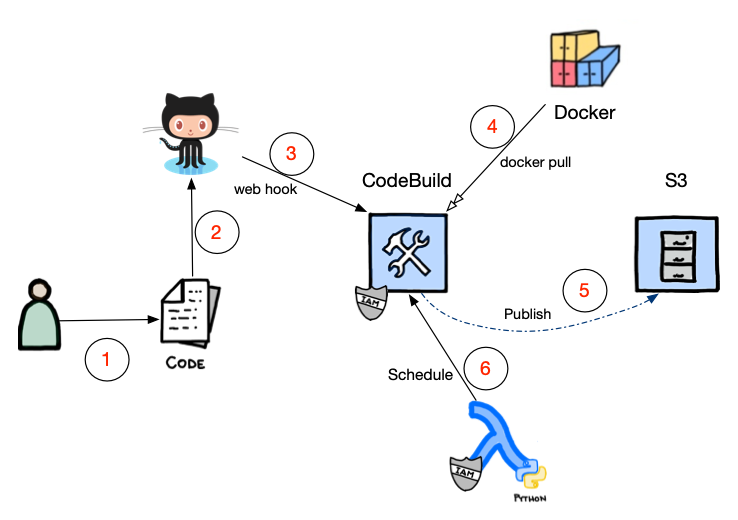
The first stage of course is to write the actual content.
When I am happy with the post, and ready to publish it - I commit the code to git.
As I mentioned before the git repository where the blog posts - are stored are on github and I also mentioned that the repository is private - that means I am the only one who can actually see the code.
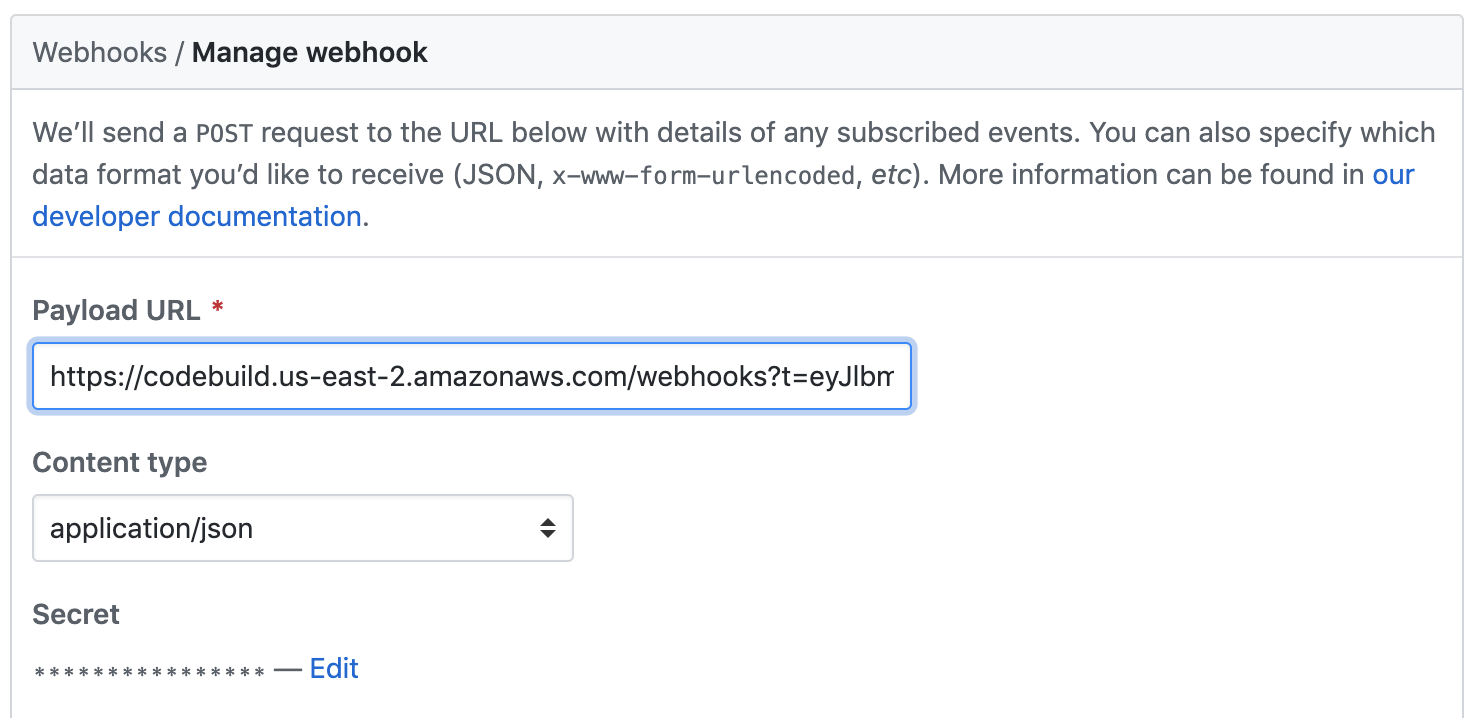
The reason for this decision, is because there are some blog posts I have published in the past, and will probably do so in the future - that are covered under NDA - and that NDA has an expiration date. If I were to commit the text to a public repository - then that information would be out there in the public domain. I would be breaking the confidence of the party that has entrusted me with this private information (something of course that I would never do). Therefore - I chose to keep my markdown source content private and closed to the world.I have a webhook enabled on the repository that will notify AWS CodeBuild, when new code is pushed.
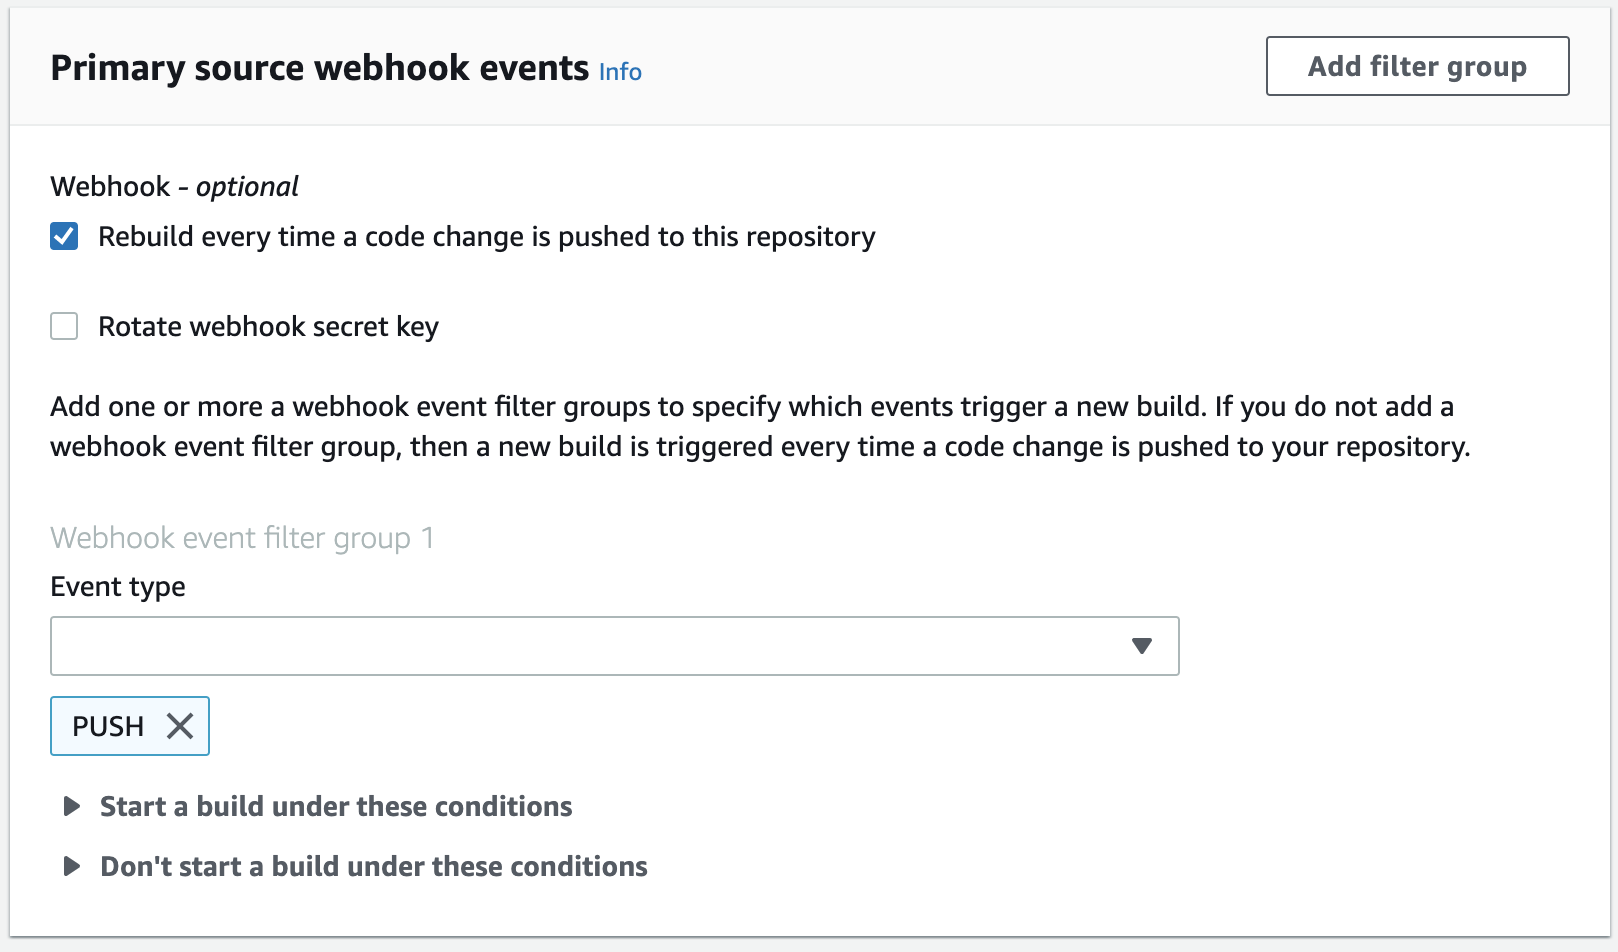
This is what it looks like from the CodeBuild side.
The configuration of the buildspec works with a container - and in my case I am using a customized container that I built, which is a minimal image (based on alpine) with a specific version of hugo (currently v0.62.0). There is an option to use a generic container image, but I opted for own docker image, because it was a waste of build time to pull the software release for each and every build and run through the same commands. It also reduced my build times by approximately 30 seconds - so it was a win-win all around.
CodeBuild works with a buildspec file which contains all the necessary steps to build my site.
The source code from my git repository is made available to the container - for every commit.Here is my current
buildspec.yml(confidential information has been removed)version: 0.2 phases: build: commands: - hugo - echo "S3 Upload Beginning" - aws s3 sync public/ s3://<_MY_S3_BUCKET_>/ --delete --size-only - echo "S3 Upload Complete" post_build: commands: - echo "Build complete" - | curl "https://api.cloudflare.com/client/v4/zones/12345678b4e8c1e87a06b58e41d0f5/purge_cache" \ -X POST -H "X-Auth-Email: $cloudflare_email" \ -H "X-Auth-Key: $cloudflare_token" \ -H "Content-Type: application/json" --data '{"files":["https://blog.technodrone.cloud/posts/index.xml","https://blog.technodrone.cloud"]}' - aws sns publish --topic-arn arn:aws:sns:us-east-2:123456789460:blog_publish --subject 'AWS CodeBuild Complete' --message 'Your build using AWS CodeBuild has been completed. Check the CodeBuild console to see the details.'Let me explain a bit about what the steps are in the
buildspecI have used two stages,
buildandpost_build.build
- the
hugocommand generates content based on the markdown and produces a directorypublicinside the container, with all the generated html files. - An
echostatement for logging purposes. - Here I sync all the static content to my S3 bucket where the site resides.
You will see that there are two flags on the command line--delete- I used this flag, so that if a post is removed from the source code - that will also remove it from the website, and the second--size-only- to ensure that only the files that have changed in size during this build, are sync’ed to the S3 bucket. By default all generated files are modified in timestamp - and that would cause for almost a full sync of the site (even though the files actually did not change at all). There is a thread here on the support site - describing the problem. - Another
echostatement for logging purposes.
post_build
- An
echostatement for logging purposes. - Here is a step that invalidates the cache for the main page of my site and the rss feed - so that changes can be picked up immediately.
I am using cloudflare as my CDN - so it is a simple curl request. Of course the credentials are passed in a environment variables - so that they are not exposed in the clear. - The last one is a notification that I send to my email account.
- the
The last part is a Lambda function. As I mentioned before there are posts that I want to write ahead of time, and have them published only at a certain date and time. The process described above only generates content - based on a git push. If the
dateof the post is sometime in the future - the static content would of course never be created. This could lead to a situation that I have already pushed the code to git, but the blog post would never be published, until I push another change to the repo. This is why I decided on using a Lambda function that would run every 4 hours, and all this function would do - was to trigger CodeBuild again - with the last commit that was registered.
This was an elegant (and cost-effective) solution to my problem. The timestamp on the post would no longer be in the future, and hugo would generate the content and of course publish the post.This is a simple Lambda function that I wrote
import os
import boto3

PROJECT_NAME = os.environ['PROJECT_NAME']
codebuildclient = boto3.client('codebuild')

def lambda_handler(event, context):
    response = codebuildclient.start_build(projectName=PROJECT_NAME)
“And that is how the sausage is made”
I would be very interested to hear your thoughts or comments so please feel free to ping me on Twitter.